
Sealing & Waterproofing Materials for Steel Structures: Enhancing Durability Through Detailing
Sealants, waterproofing membranes, flashing tapes, and weather-resistant detailing for steel roof and wall cladding. Learn material selection, weather resistance standards, and leak prevention strategies.
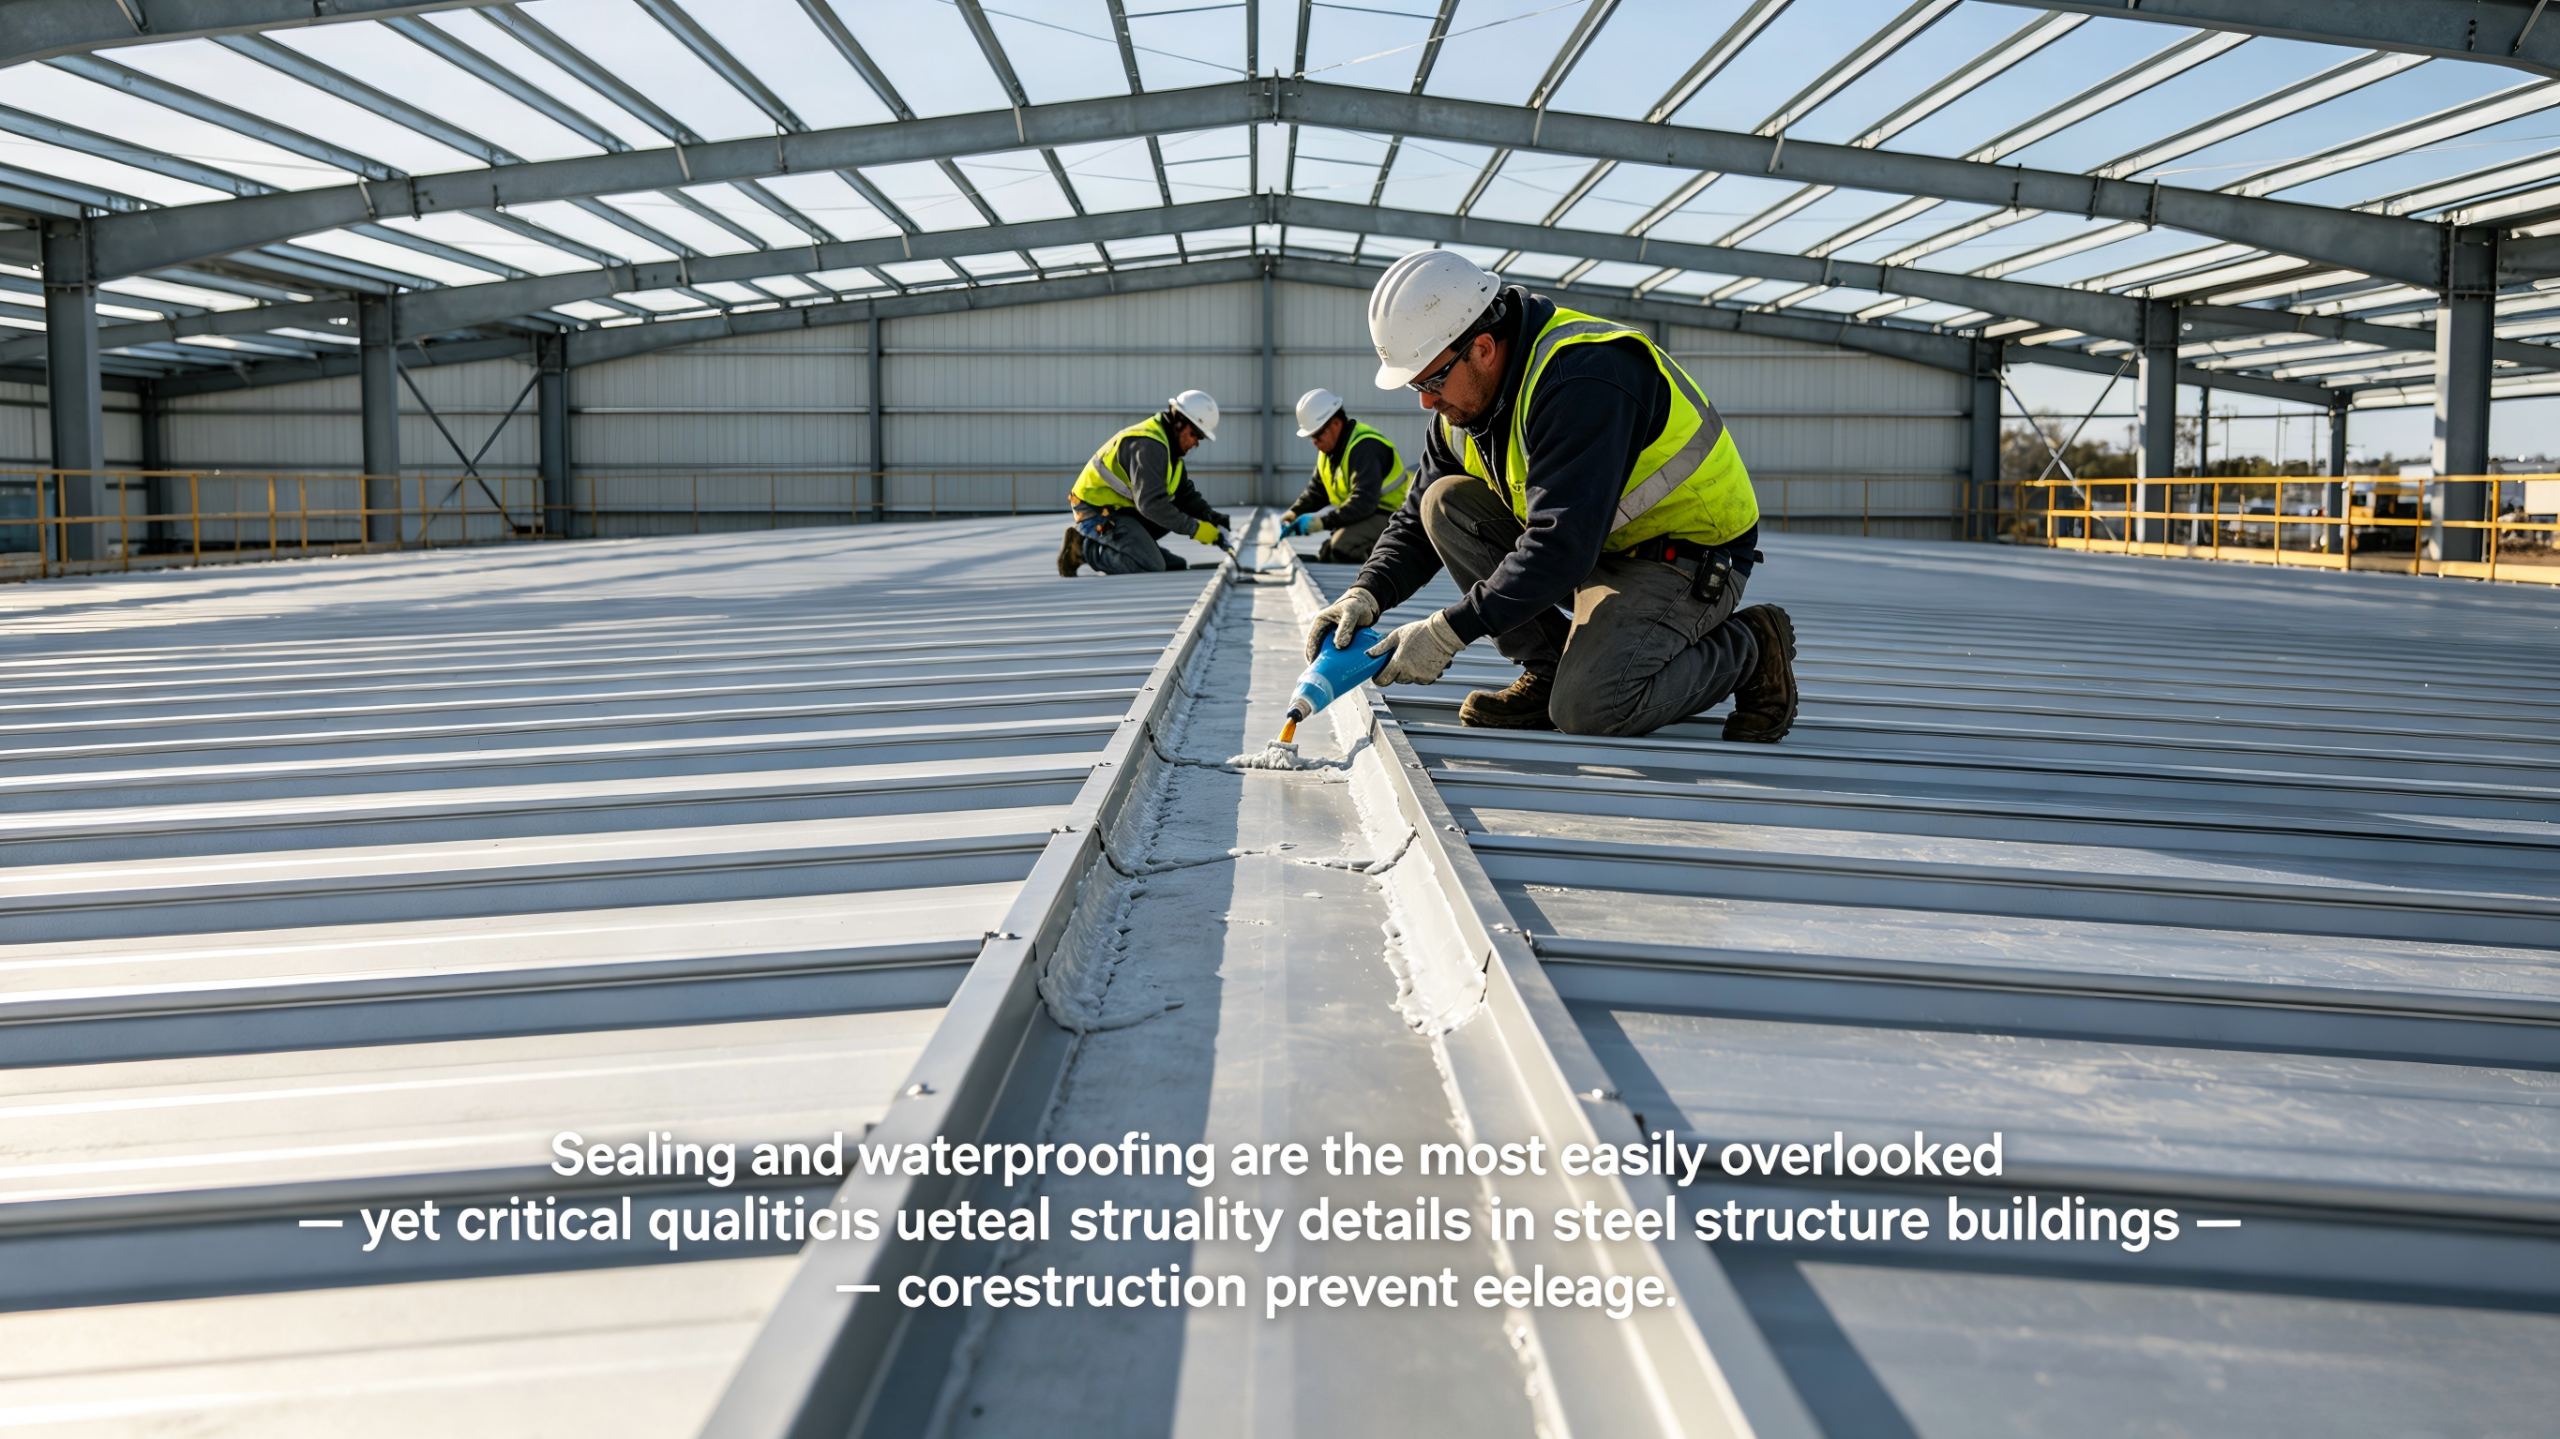
A steel building can have the strongest frame, the thickest insulation, and the most beautiful cladding. But if water gets in, none of that matters. Water infiltration leads to corrosion, insulation degradation, mold, and occupant complaints.
The difference between a leaky building and a dry one is not in the major structural components. It is in the details: sealants, flashing tapes, gaskets, and waterproofing membranes. These small materials are disproportionately critical to building performance and owner satisfaction.
For overseas clients, understanding sealing and waterproofing materials is essential for specifying the right products and ensuring long-term durability.
This guide covers:
- Types of sealants and their applications.
- Flashing tapes and membranes.
- Gaskets and weather stripping for fastener and panel laps.
- Weather resistance standards and testing.
- Detailing for roof penetrations, ridges, eaves, and wall openings.
- Linking to roofing and cladding installation quality.
1. Why Waterproofing & Sealing Matter for Steel Buildings
Water is the enemy of steel buildings through multiple mechanisms:
| Problem | Mechanism | Consequence |
|---|---|---|
| Corrosion | Moisture + oxygen + steel = rust | Section loss, eventual perforation, structural weakening |
| Insulation degradation | Wet insulation loses R-value permanently | Higher energy costs, condensation risk |
| Mold & mildew | Organic dust + moisture = mold growth | Health complaints, building downtime |
| Freeze-thaw damage | Water trapped in joints freezes | Expansion cracks sealants and cladding |
| Aesthetic damage | Water stains, efflorescence, rust streaks | Poor appearance, reduced property value |
The economics: A leak that costs 500tofixduringconstruction(additionalsealant,betterflashing)cancost5,000-15,000 to repair after the building is finished (interior damage, access difficulties, lost production).
2. Types of Sealants for Steel Structures
Sealants are flexible materials applied to joints, seams, and penetrations to prevent water and air passage.
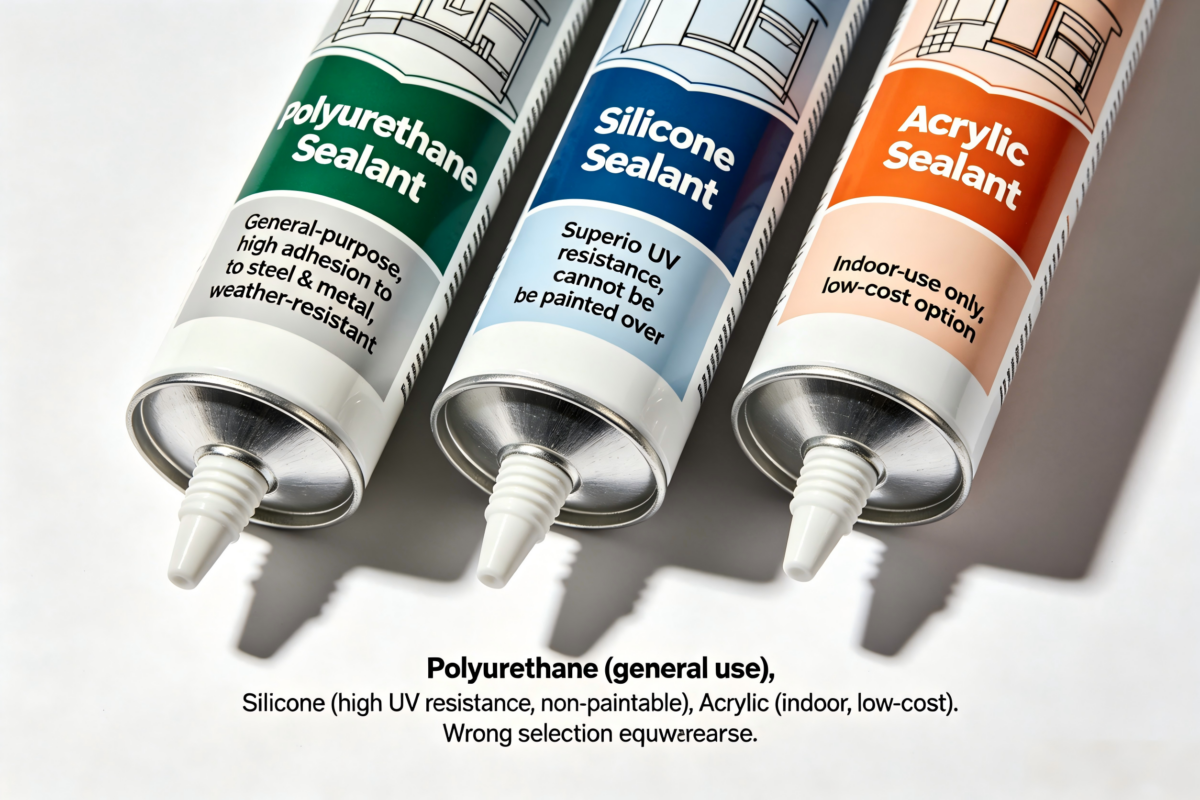
A. Polyurethane Sealants (Most Common for Steel Buildings)
| Property | Value |
|---|---|
| Elongation | 300-600% |
| Movement capacity | ±25-35% of joint width |
| Temperature range | -30°C to +80°C |
| Adhesion | Excellent to steel, coated steel, Galvalume |
| UV resistance | Good (requires topcoat or formulation) |
| Typical life | 10-15 years |
| Cure type | Moisture-cure (reacts with humidity) |
Best for: Vertical and low-slope roof joints, wall panel laps, flashing to cladding, gutter seals.
Advantages:
- Excellent adhesion to most steel coatings.
- High movement capacity (accommodates thermal expansion).
- Paintable after cure.
Disadvantages:
- Requires primer on some surfaces (check manufacturer data).
- Moisture cure means limited working time in high humidity.
- More expensive than acrylics.
B. Silicone Sealants
| Property | Value |
|---|---|
| Elongation | 400-800% |
| Movement capacity | ±30-50% |
| Temperature range | -50°C to +150°C |
| Adhesion | Excellent to glass, metal, some coatings (requires primer on some) |
| UV resistance | Excellent (best of all sealants) |
| Typical life | 20-25 years |
| Cure type | Moisture or neutral cure |
Best for: Roof panel laps (especially standing seam), skylight and glazing seals, exposed high-UV joints, metal to glass.
Advantages:
- Excellent UV resistance (does not chalk or crack).
- Highest temperature range.
- Very high elongation.
Disadvantages:
- Cannot be painted (silicone repels paint).
- More expensive than polyurethane.
- Requires specific surface preparation.
C. Acrylic (Latex) Sealants
| Property | Value |
|---|---|
| Elongation | 100-200% |
| Movement capacity | ±7-15% |
| Temperature range | -20°C to +60°C |
| Adhesion | Good to many surfaces |
| UV resistance | Moderate to good |
| Typical life | 5-10 years |
| Cure type | Water evaporation |
Best for: Interior applications, low-movement joints, temporary sealing, touch-up.
Advantages:
- Lowest cost.
- Water cleanup (painter-friendly).
- Paintable.
Disadvantages:
- Low movement capacity (not for structural joints or thermal expansion).
- Shorter life.
- Not for immersion or ponding water.
Rule: Do not use acrylic sealants on exterior roof joints or cladding laps where significant thermal movement occurs.
D. Butyl Sealants and Tapes
| Property | Value |
|---|---|
| Form | Gun-grade (paste) or pre-formed tape |
| Adhesion | Excellent (pressure-sensitive) |
| Movement capacity | Moderate (butyl tape: low; gun-grade: medium) |
| UV resistance | Poor (requires cover or over-sealing) |
| Typical life | 10-15 years (protected from UV) |
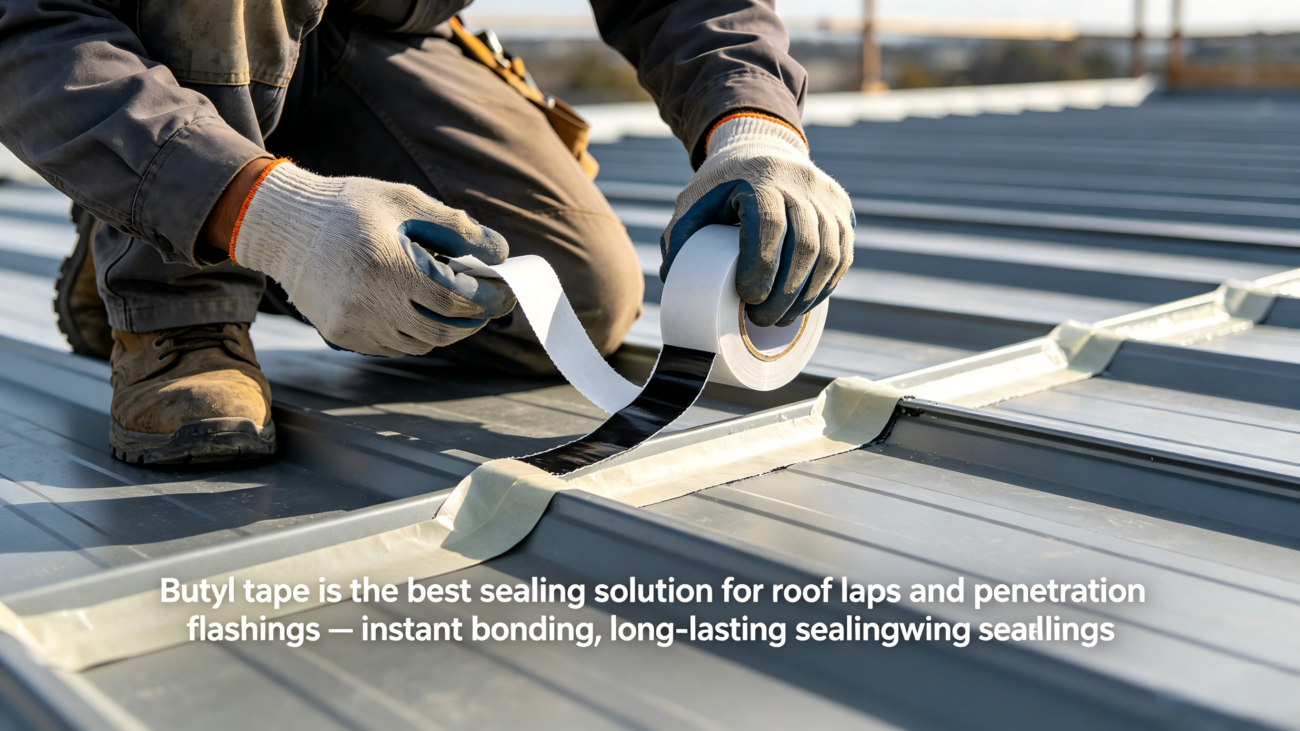
Best for: Hidden joints, lapped panel seams, flange-to-flange seals, gutter laps, under flashing.
Advantages:
- Excellent adhesion to oily or minimally prepared surfaces.
- Butyl tape is quick to apply (peel and stick).
- Remains flexible indefinitely.
Disadvantages:
- Poor UV resistance (will degrade and crack if exposed).
- Messy application (gun-grade butyl strings and smears).
- Difficult to remove.
3. Flashing Tapes & Self-Adhered Membranes
Flashing tapes are peel-and-stick membranes used for larger area waterproofing, roof penetrations, and critical transitions.
A. Butyl Flashing Tape (with aluminum or polymer backing)
| Property | Value |
|---|---|
| Thickness | 1.0-1.5mm butyl + 0.1mm aluminum or polymer film |
| Widths | 50mm, 75mm, 100mm, 150mm, 200mm |
| Adhesion | Excellent to clean, dry steel |
| Temperature range | -20°C to +80°C |
| Lifespan | 10-20 years (depending on UV exposure) |
Applications:
- Roof penetration flashings (pipes, vents, HVAC curbs).
- Lap joints in roof membranes.
- Gutter and downspout connections.
- Ridge and eave details (under metal flashing).
Installation requirement: Surface must be clean, dry, and free of oil. Roll with pressure (hand roller recommended). Minimum application temperature typically 5°C.
B. Acrylic (Water-Based) Flashing Tape
| Property | Value |
|---|---|
| Adhesion | Good to most steel coatings |
| UV resistance | Good (acrylic is UV-stable) |
| Lifespan | 10-15 years |
| Application | Requires primer on some surfaces |
Advantage: Can be applied to damp surfaces (unlike butyl, which requires dry).
Disadvantage: Less aggressive adhesion than butyl.
C. Rubberized Asphalt Membrane (Self-Adhered)
Used for low-slope roof systems, not typically for standing seam metal roofs.
| Property | Value |
|---|---|
| Thickness | 1.5-3.0mm |
| Application | Peel and stick to clean steel deck or rigid insulation |
| Lifespan | 15-25 years |
| Fire rating | Class A (with top coating or cover board) |
Best for: Low-slope (1/4:12 or less) metal roof decks, especially in commercial buildings.
4. Gaskets & Weather Stripping
Compressible seals installed at panel laps, fastener locations, and between components.
A. EPDM (Ethylene Propylene Diene Monomer) Gaskets
| Property | Value |
|---|---|
| Temperature range | -40°C to +120°C |
| UV resistance | Excellent |
| Compression set | Low (springs back) |
| Lifespan | 20-30 years |
Applications:
- Standing seam roof clips (between clip and panel).
- Panel end laps (pre-applied foam tape).
- Gutter and downspout connections.
- Penetration flashings.
Forms: Pre-cut pads, continuous roll tape, extruded profiles (tubular or solid).
B. Closed-Cell Neoprene (CR) or EPDM Foam Tape
| Property | Value |
|---|---|
| Cell structure | Closed (does not absorb water) |
| Compression | 50-70% compressible |
| Temperature range | -30°C to +90°C |
| UV resistance | Good to excellent (EPDM better) |
Applications:
- Thermal break between steel purlins and roof panels.
- Under flashing at ridges and eaves.
- Gutter support pads.
Note: Open-cell foam absorbs water like a sponge. Specify only closed-cell for exterior applications.
C. Pre-Applied Mastic (Butyl or Polyurethane)
Some panel systems come with pre-applied mastic strips on side laps and end laps. When panels are lapped, mastic compresses to form a seal.
Advantage: Fast installation (no field-applied sealant).
Disadvantage: If panels are separated and repositioned, mastic loses seal.
5. Fastener Sealing (Critical for Screw-Fixed Cladding)
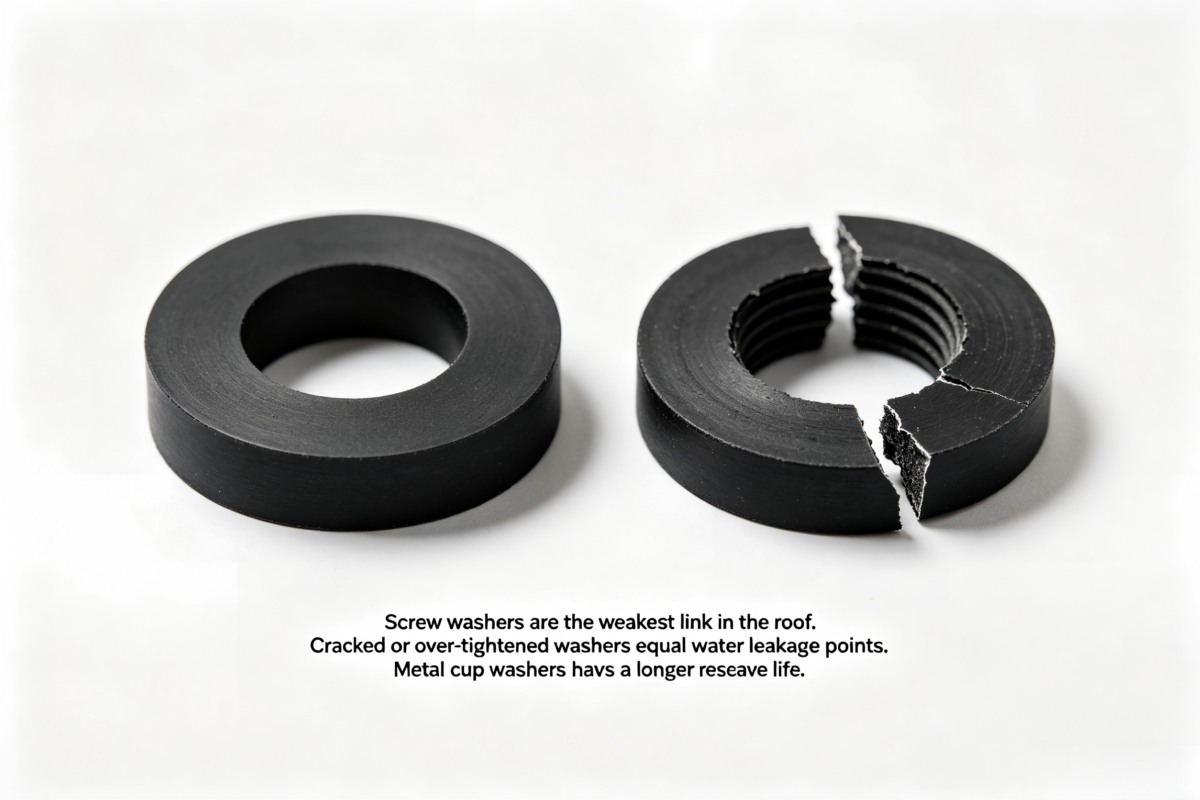
The single most common source of roof leaks is not failed sealant on flashing—it is fasteners (screws) with damaged, missing, or degraded washers.
| Fastener Type | Sealing Mechanism | Lifespan | Common Failure |
|---|---|---|---|
| Screw with EPDM washer | Washer compresses against panel surface | 15-20 years | Washer cracks from UV or over-torque |
| Screw with neoprene washer + metal cup | Washer compressed within cup (protected from UV) | 20-25 years | Cup corrodes, washer dries out |
| Standing seam (no exposed fasteners) | None (no fastener penetrates panel) | 30+ years | Not applicable (superior system) |
| Screw with integral sealing compound | Compound flows around threads | 5-10 years | Compound dries, cracks |
Best practice for screw-fixed roofs:
- Specify screws with neoprene or EPDM washers in metal cups (washer protected from UV).
- Verify correct washer size (washer diameter must exceed hole size + panel rib width).
- Check gasket condition on every screw during installation.
- Do not over-torque (gasket should be slightly compressed, not extruded).
Signs of fastener sealing failure:
- Rust staining radiating from screw (water tracking under washer).
- Washer cracked or missing.
- Screw overdriven (gasket deformed outward).
- Screw underdriven (gasket not touching panel).
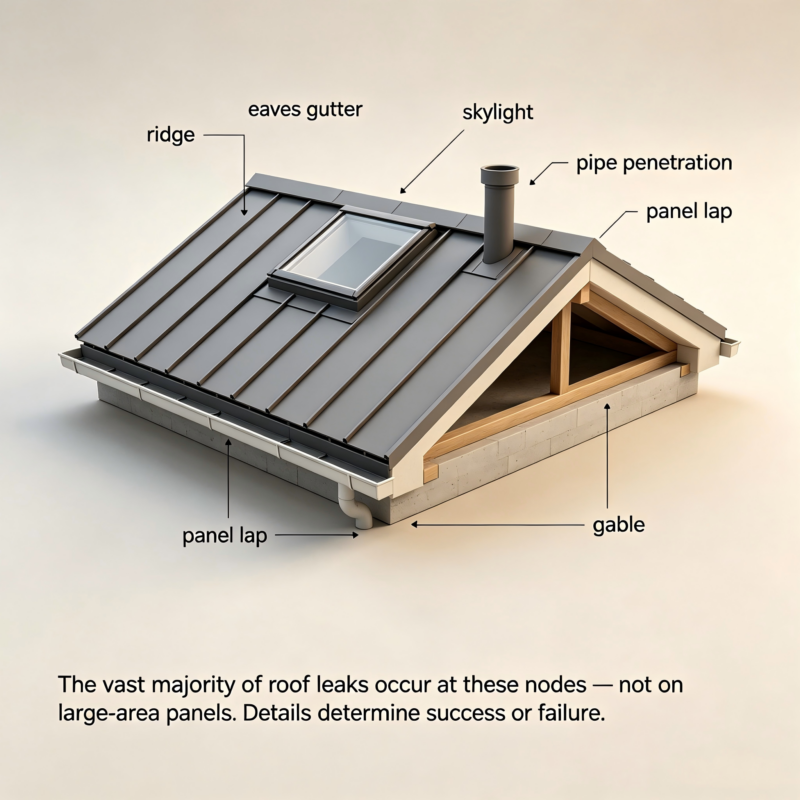
6. Details for Critical Leak Points (Roof)
Most roof leaks occur at specific details, not the middle of large flat panels.
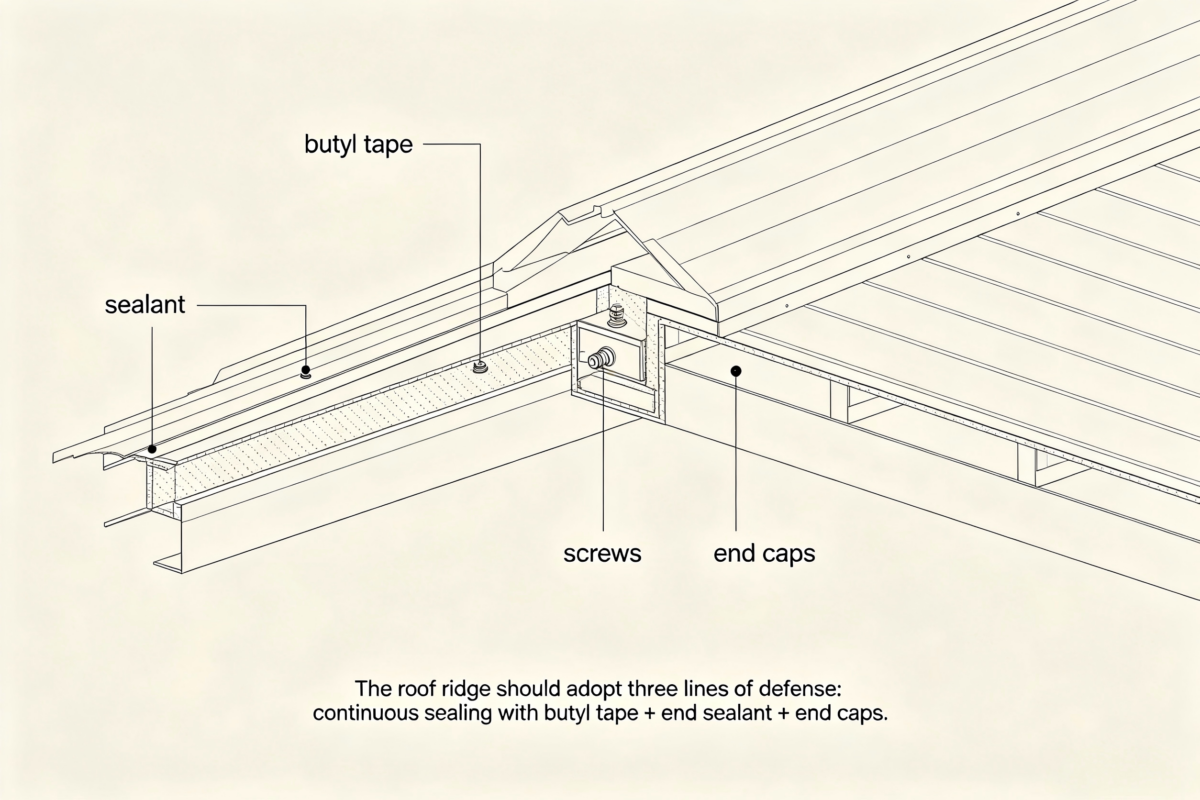
A. Roof Ridge
| Detail | Sealing Requirement |
|---|---|
| Ridge cap to panel | Butyl tape or pre-applied mastic under ridge cap. Sealant at end closures |
| Ridge vent (if present) | Continuous closed-cell foam gasket between vent and panel |
| Ridge to gable end | End closure (pre-formed metal) sealed with sealant and screws |
Common mistake: Ridge cap screws too widely spaced → cap lifts in wind, water driven under.
B. Eaves and Gutters
| Detail | Sealing Requirement |
|---|---|
| Gutter to fascia | Butyl tape or sealant continuous along back of gutter. Screws at 300mm o.c. |
| Gutter lap joints | Butyl tape between sections + sealant at end laps |
| Downspout to gutter outlet | Sealant around outlet flange (or pre-formed gasket) |
| Eave trim to panel | Closed-cell foam filler at panel corrugations (prevents bird/insect entry + water) |
C. Penetrations (Vents, Pipes, HVAC Curbs)
| Penetration Type | Sealing Method |
|---|---|
| Round pipe (<300mm) | Boot-style flashing (EPDM or silicone) clamped to pipe, sealed to roof with butyl tape + screws |
| Rectangular duct / curb | Curb manufactured with integral flange. Butyl tape under flange. Sealant at flange-to-panel joint. Optional: self-adhered flashing tape over flange |
| Skylight | Silicone sealant between frame and panel. Butyl tape under frame. Some codes require secondary seal (flashing over frame) |
| Solar panel mounting | Avoid penetrations where possible (ballasted or clamp systems). If penetrated, use EPDM boots or custom flashing with sealant |
Best practice for penetrations: One primary seal (butyl tape or gasket) + one secondary seal (silicone or polyurethane sealant) = redundant sealing.
D. Side Laps and End Laps (Panel-to-Panel)
| Lap Type | Sealing Requirement |
|---|---|
| Side lap (vertical seam between adjacent panels) | Pre-applied mastic or field-applied butyl tape. Some systems use closed-cell foam gasket |
| End lap (upper panel overlapping lower panel) | Butyl tape across full width. Sealant at side lap intersections. Lap length minimum 150mm (6 inches) |
Critical: End laps must be oriented so upper panel overlaps lower panel (shingle effect). Wrong orientation (lower over upper) guarantees leak.
7. Details for Wall Cladding
Walls are less leak-critical than roofs but still require attention.
| Location | Sealing Requirement |
|---|---|
| Base of wall (cladding to foundation) | Z-flashing or base angle sealed to foundation with sealant or butyl tape. Backer rod for large gaps (>12mm) |
| Window and door openings | Flashing tape (peel-and-stick) around rough opening. Sealant between frame and cladding. Drip cap above opening |
| Inside and outside corners | Corner trim sealed with sealant at both edges. Backer rod if gap >6mm |
| Through-wall penetrations (pipes, conduits) | Boot or flashing plate sealed to cladding with sealant. Sealant inside penetration annulus |
| Horizontal lap joints (if horizontal panels) | Upper panel overlaps lower panel (shingle). Butyl tape in lap |
8. Weather Resistance Standards & Testing
When specifying sealants and tapes, reference recognized standards.
| Standard | Region | Scope |
|---|---|---|
| ASTM C920 | USA | Specification for elastomeric joint sealants (Type S, Grade NS, Class 25 etc.) |
| ASTM D1970 | USA | Self-adhering flashing for roof penetrations |
| ISO 11600 | International | Building construction – joint sealants (Class F-25, G-25 etc.) |
| EN 15651 | Europe | Sealants for facades, glazing, roofs |
| GB/T 14683 | China | Silicone building sealant |
| GB/T 13477 | China | Test methods for building sealants |
Key parameters to verify on data sheets:
| Parameter | Typical Requirement |
|---|---|
| Movement accommodation | ≥±25% for roof joints (Class 25 or 25LM) |
| UV resistance | No cracking or chalking after 500-1000 hours accelerated weathering |
| Adhesion in peel | ≥2 N/mm width (to coated steel) |
| Low-temperature flexibility | No cracking at -30°C (for cold climates) |
| Water immersion | No adhesion loss after 7 days immersion |
| Hardness (Shore A) | 15-30 (soft and flexible) |
9. Material Selection by Application
| Application | Primary Seal | Secondary Seal | Notes |
|---|---|---|---|
| Roof panel side lap (exposed) | Pre-applied mastic or butyl tape | Optional (silicone at ends) | Avoid exposed sealant where possible (panel design) |
| Roof panel end lap | Butyl tape (full width) | Polyurethane at side lap intersection | Lap length ≥150mm |
| Ridge cap to panel | Butyl tape | Polyurethane at end closures | Screws through cap into panel |
| Penetration flashing to panel | Butyl tape under flange | Silicone or polyurethane around perimeter | Redundant seal |
| Gutter to fascia | Butyl tape (continuous) | None (if tape is continuous) | Screws through tape |
| Window to cladding | Flashing tape (peel-and-stick) | Silicone or polyurethane at frame | Flashing over sealant |
| Standing seam clip | Pre-attached EPDM gasket | None (clip is under panel) | Gasket thickness matched to clip design |
| Screw fastener | EPDM or neoprene washer in metal cup | None (washer is seal) | Verify washer condition |
| Through-wall pipe | EPDM boot with clamp | Polyurethane at boot-to-wall | Boot must be sized to pipe |
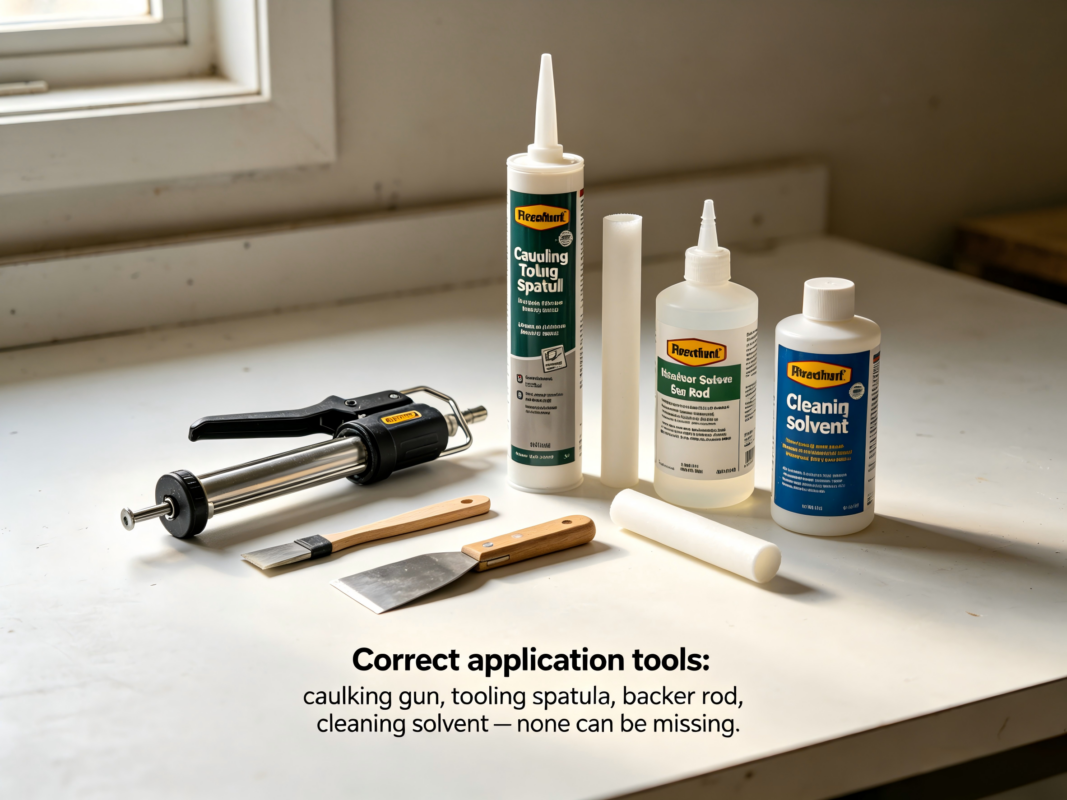
10. Application Best Practices
Sealant and tape performance depends heavily on correct application.
| Practice | Requirement |
|---|---|
| Surface preparation | Clean, dry, free of oil, dust, loose coating. Use solvent wipe (acetone, isopropyl alcohol) for critical seals |
| Primer | Use manufacturer-recommended primer for difficult surfaces (some coated steels, weathered Galvalume) |
| Backer rod | Required for joints >6mm wide. Closed-cell polyethylene (not open-cell) |
| Tooling | Tool sealant into joint for adhesion (tooling also compacts sealant against surfaces). Smooth concave profile (not flat) |
| Minimum application temperature | Typically 5°C (40°F). For butyl tape, some products require >10°C |
| Working time | Polyurethane: 15-30 minutes. Silicone: 5-15 minutes. Acrylic: 20-40 minutes |
| Cure time | Polyurethane: 7-14 days (full cure). Silicone: 24-72 hours. Acrylic: 24 hours |
| Tooling fluid | Soapy water for polyurethane (prevents sticking). Isopropyl alcohol for silicone |
Common application mistakes:
- No backer rod in deep joints → sealant extruded from back (three-sided adhesion) → sealant tears under movement.
- Over-tooling (excessive smoothing) → pushes sealant away from bond line.
- Under-filling joints (too thin) → sealant tears under movement.
- Applying sealant over dust, moisture, or frost → zero adhesion.
11. Sealant & Tape Lifespan (Realistic Expectations)
| Material | Indoor / Protected | Outdoor (UV exposed) | Notes |
|---|---|---|---|
| Polyurethane | 15-20 years | 10-15 years | Topcoat extends life |
| Silicone | 25-30 years | 20-25 years | Best for UV exposure |
| Acrylic (latex) | 5-10 years | 3-5 years | Not for exterior roof joints |
| Butyl (protected) | 15-20 years | 5-10 years (if exposed) | Degrades rapidly in UV |
| Butyl tape (protected) | 15-20 years | Not for direct UV | Excellent under flashings |
| EPDM gasket | 20-25 years | 15-20 years | UV resistant |
| EPDM screw washer | 15-20 years | 10-15 years | Washer in cup lasts longer |
| Closed-cell foam tape | 15-20 years | 10-15 years | UV degrades cell structure |
Maintenance schedule:
- Year 5-7: Inspect all visible sealants and screw washers. Touch-up or replace as needed.
- Year 10-12: Re-seal critical joints (roof penetrations, ridges, gutters).
- Year 15-20: Plan for full sealant replacement and screw re-torquing or replacement.
12. Cost Control for Sealing & Waterproofing
Sealants and tapes are a tiny percentage of total building cost (typically 0.5-1.5%). But cost-cutting here is high-risk.
| Cost Strategy | How to Implement | Risk if Cut |
|---|---|---|
| Use silicone for exterior (not acrylic) | Higher upfront cost, longer life | Acrylic fails in 3-5 years, leak repairs cost 10x |
| Standardize sealant types | One polyurethane for 80% of applications | Fewer products means less confusion, less waste |
| Pre-applied mastic on panels (factory) | Higher initial panel cost | Field-sealed laps are less reliable |
| EPDM washers in metal cups | Slightly higher screw cost | Exposed EPDM washers crack in UV |
| Butyl tape (not gun-grade butyl) | Faster installation, less mess | Gun-grade butyl slower, inconsistent thickness |
| Avoid over-specifying | Class 25 movement is enough for most steel roofs | Class 50 or 100 is unnecessary (costs more) |
Value takeaway: Spend an extra 0.5% of total building budget on high-quality sealants and proper detailing. It is the cheapest insurance against the most expensive repair item (roof leaks).
13. Link to Steel Structure Roofing & Waterproofing Service
We treat sealing and waterproofing as a system—not an afterthought. Every joint, lap, penetration, and fastener is detailed on our shop drawings and verified during installation.
Our sealing and waterproofing scope includes:
- Design detailing: Ridge, eave, gable, penetration, and transition details with redundant seals.
- Material specification: Polyurethane or silicone sealants, butyl tapes, EPDM gaskets, and flashings. All with weather resistance certifications.
- Supply: Pre-cut flashing tapes, sealant cartridges, backer rod, primer, and screw fasteners with UV-resistant washers.
- Installation (for our full-service packages): Surface preparation, primer application, backer rod placement, sealant tooling, and quality inspection.
- Inspection only (for self-install): We can provide detailed drawings, material lists, and a sealed sample for reference.
- Quality documentation: Photos of critical seals before, during, and after application. DFT (for sealant bead dimensions). Leak testing (water hose) on completed roof prior to handover.
For overseas clients:
We can ship pre-cut and labeled flashing kits for each roof penetration (pipe boot, curb flashing, ridge closure). We provide a sealant application video specific to your building detailing. For full-service projects, we can include water hose testing in our quality sign-off.
👉 [Request a roofing and waterproofing quote]
Send us your roof and wall cladding drawings or panel specifications. Tell us your local climate (rainfall, temperature range, UV exposure). We will return a sealing material schedule, detailing drawings, and a budget price within 48 hours.
Summary Table: Quick Sealing Material Selection
| Joint / Detail | Primary Seal | Secondary Seal (if needed) | Movement Capacity Required |
|---|---|---|---|
| Roof panel end lap | Butyl tape (50mm wide) | Polyurethane at lap intersection | ±15% |
| Ridge cap to panel | Butyl tape | Polyurethane at end closures | ±20% |
| Penetration to panel (flange) | Butyl tape | Silicone perimeter | ±25% |
| Gutter to fascia | Butyl tape (continuous) | None | ±10% (low) |
| Window to cladding | Flashing tape (peel-and-stick) | Silicone at frame | ±15% |
| Standing seam clip (under panel) | EPDM gasket (pre-attached) | None | ±30% |
| Screw fastener | EPDM washer (metal cup) | None | N/A (washer seals) |
| Interior seal (air barrier) | Acrylic | None | ±7-10% |